
Overview: Are you looking for a solution to backup Rackspace emails to PC? If yes, then you have landed at the right place. In this article, we are going to discuss 2 two different ways to download emails from Rackspace to Computer. Here, you will get both manual and automated solutions to carry out this task without any issues. So, let’s get started!
So, let’s start this blog by first learning the benefits of backing up Rackspace email data then we will proceed to the methods.
What are the Benefits of Backing Up Rackspace Mail?
Backing up means keeping an extra copy of your important information in a secure place. This way, if anything happens to your original data, you’ll have a backup to prevent permanent loss.
- Option to exclude attachments during the backup process.
- Easily access Rackspace Mail data across platforms or email services.
- Protects your data from malware attacks and accidental deletion.
- Backing up Rackspace emails to PST lets you add them to any Outlook profile.
- To keep them safe and ready to share or move as needed.
How to Backup Rackspace Emails to PC via Thunderbird?
1. Launch Mozilla Thunderbird application on your system.
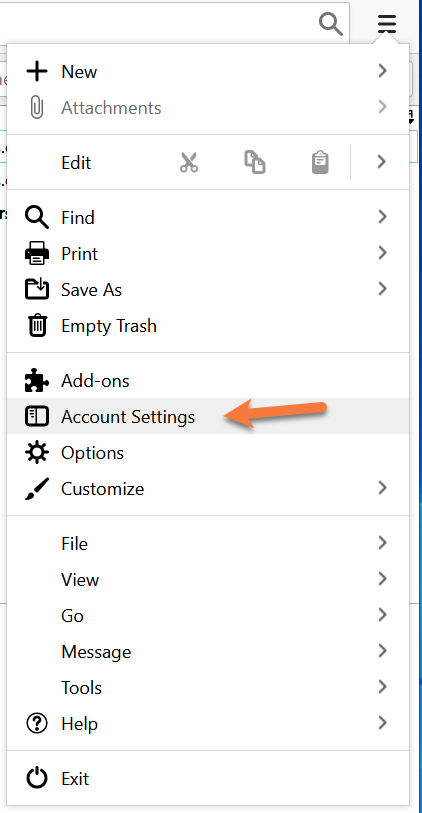
2. Click on Three horizontal line and select Account Settings option.
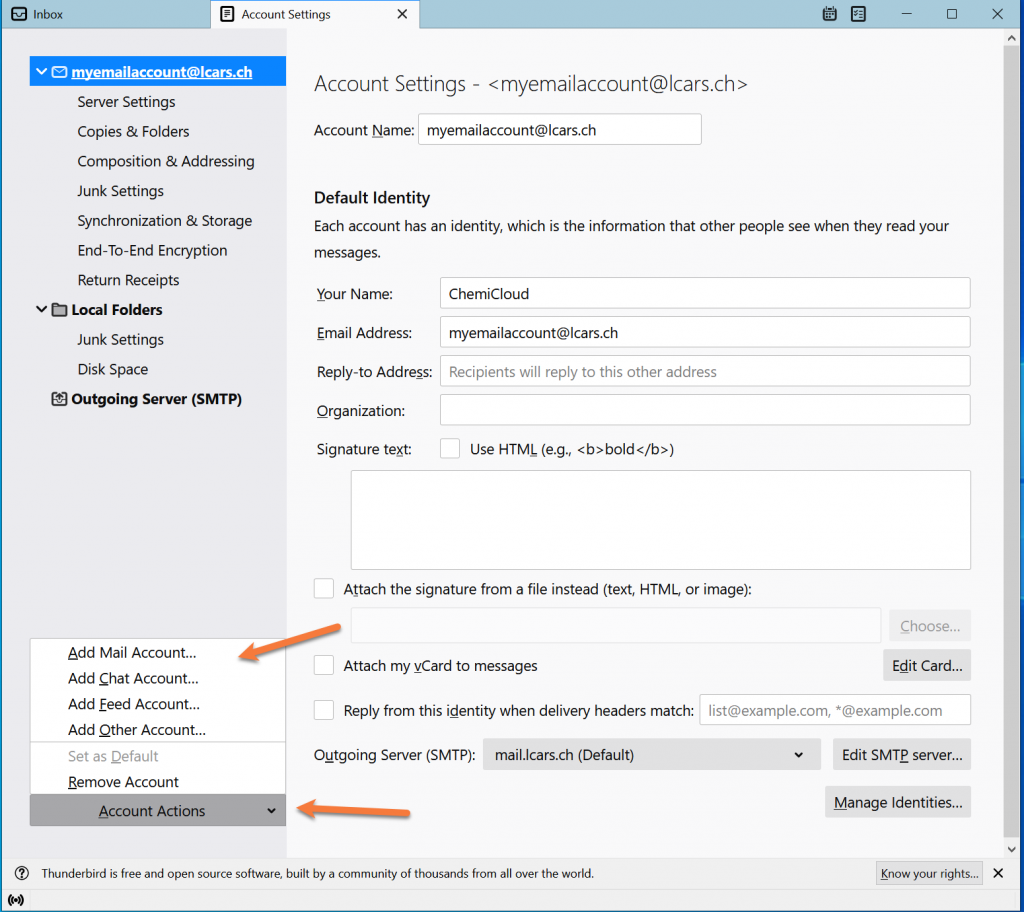
3. Click on Account Actions and select Add Mail Account.
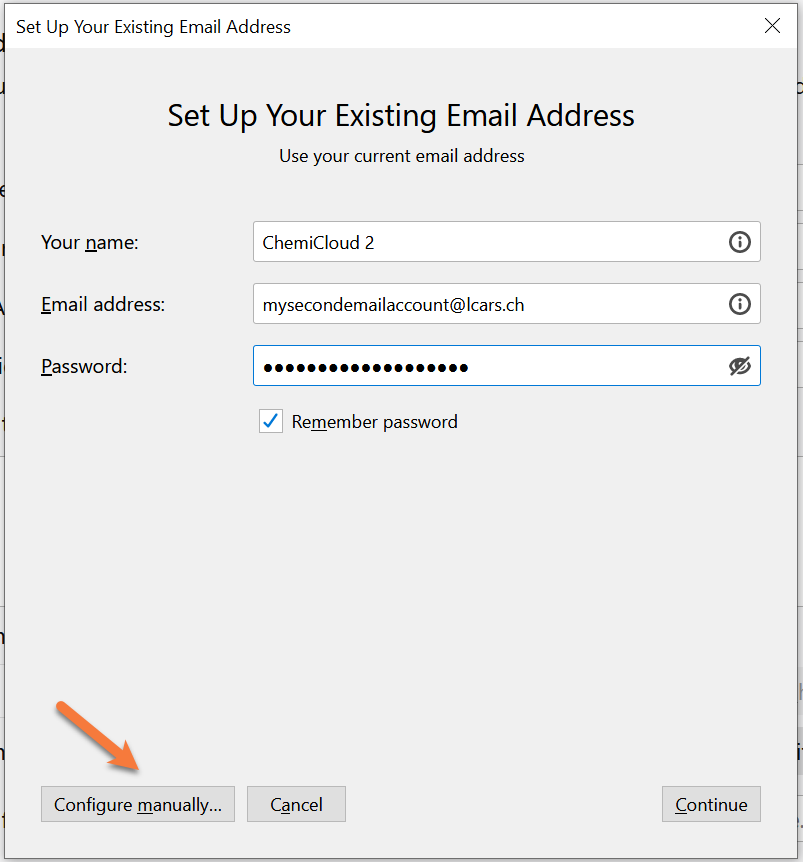
4. Enter your Rackspace account information to configure with Thunderbird.
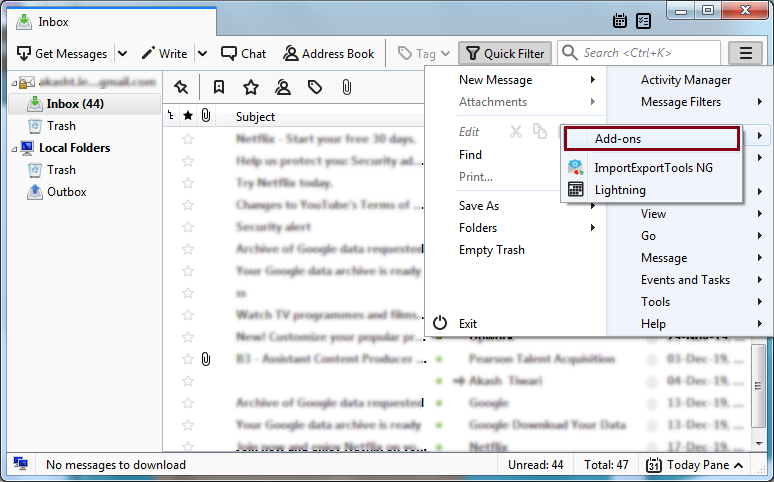
5. After configuration click on menu and select Add-ons option.
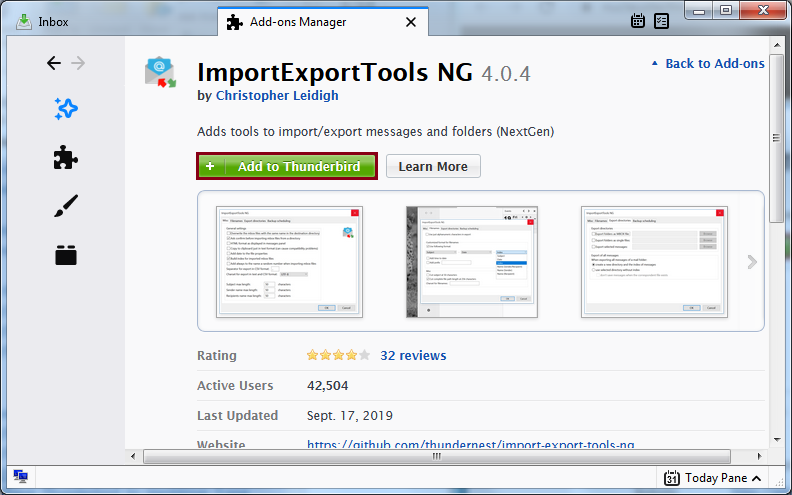
6. Install ImportExportTools NG in Thunderbird.
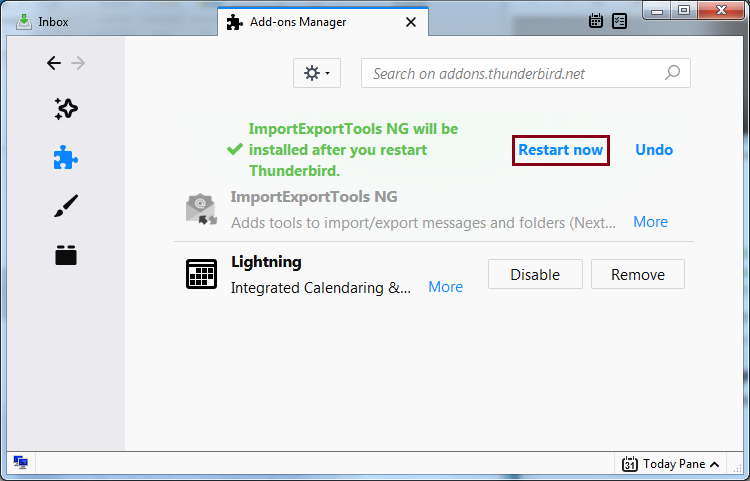
7. After installing, restart your Thunderbird application.
8. Now, right click the Rackspace mailbox folder, select ImportExportTools>>Export all messages in the folder>> EML format.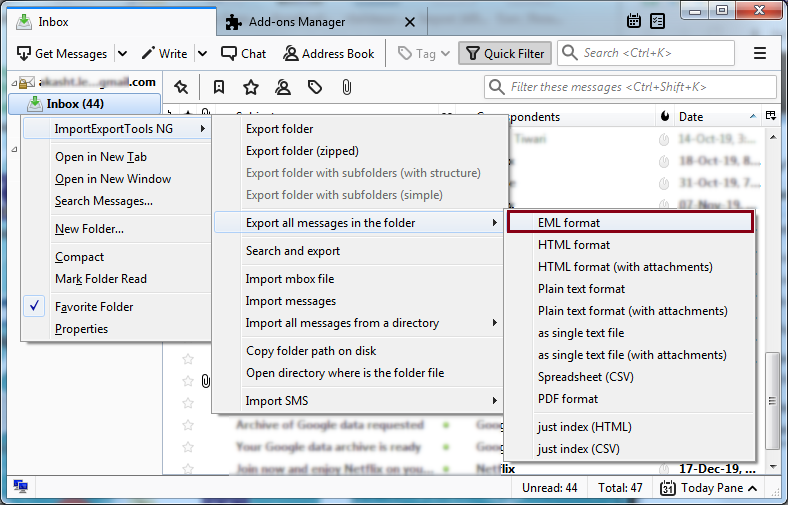
9. Select your location to save your files at your desired place.

What are the Limitations of the Manual Method?
- Requires Configuring Rackspace Account with Thunderbird
- It involves a long process with many steps, so it takes time.
- Difficult to use for non-technical users.
How to Download Rackspace Emails to PC Instantly?
To overcome all the limitations of the manual approach check out Email Backup Wizard on your system. The software can easily download emails from Rackspace account in just a few simple clicks. You will get more than 30+ saving options to save Rackspace emails into multiple formats such as PST, MBOX, MSG, PDF, DOC, HTML, etc. Additionally, it also enables you to download selected emails based on date range.
Download the FREE version of this utility to check its work performance.
Note: It is available for both Mac and Windows machines.


Steps to Backup Rackspace Emails With Attachments
Step 1. Run Rackspace Backup Tool on your system.

Step 2. Choose Rackspace from email source list and enter its login details to sign in.

Step 3. Choose required mailbox folders.

Step 4. Select a saving option from given list.

Step 5. Choose destination location to save resultant file.

Step 6. Click on Backup button to begin the process.

The software will start downloading emails from Rackspace email account. In a few minutes, your backup process will be complete. And you will be notified with a log text on your screen.
Why Choose Rackspace Email Backup Wizard?
- Easy Graphical Interface: It is designed with an advanced algorithm. The interface of this wizard is very simple and easy to use. Both technical and non-technical users can easily use it without having any technical knowledge.
- Folder Selection Option: Users who wish to back up Rackspace emails of selective folders. So this software allows you to choose the folders as per your choice. This tool scans all folders and subfolders like Inbox, Sent Items, Important, Trash, etc. This option will not only save manual efforts but also your time.
- Email Filter Option: The software will provide various advanced filter options for selective backup. With these filters, you can save Rackspace emails based on Date Range, To, From, Subject, etc.
- Various Saving Options: This Email Backup Wizard allows users to choose the desired file formats in which they wish to export their emails. You can download emails from Rackspace to PST, EML, MSG, EMLX, MBOX, DOC, HTML, etc.
- Transfer Emails to Cloud Server: The software can transfer emails to another targeted email service provider. With this tool, you can migrate Rackspace emails to Gmail, Office 365, Yahoo Mail, and many other email accounts.
- Desired Location: You are given the freedom to choose your location to save your files. Hence, any confusion regarding the exported files in which place can be easily resolved.
Wrapping it Up
In this post, we have discussed how to backup Rackspace emails with 2 different methods. We have analyzed the manual method, which is complicated and involves several steps that need to be performed very carefully otherwise you will never be able to save Rackspace email on PC. Therefore, We highly recommend the automated tool for downloading Rackspace emails. Try it once by downloading the given link, it’s totally free as you don’t need to pay for it.
Frequently Asked Questions
Q 1. Is it possible to download all emails from the Rackspace mailbox in one go?
Ans – Yes, with this tool, you can save the complete mailbox at once.
Q 2. How many email file formats are available in this tool?
Ans – You can export emails in 25+ file formats like PST, MSG, EML, MBOX, EMLX, PDF, RTF, HTML, DOC, etc.
Q 3. Do I have any option to choose only selected folders to backup?
Ans. Yes, the software allows you to select selected mailbox folders (e.g. Inbox, Sent Items, Drafts as per your choice).

